

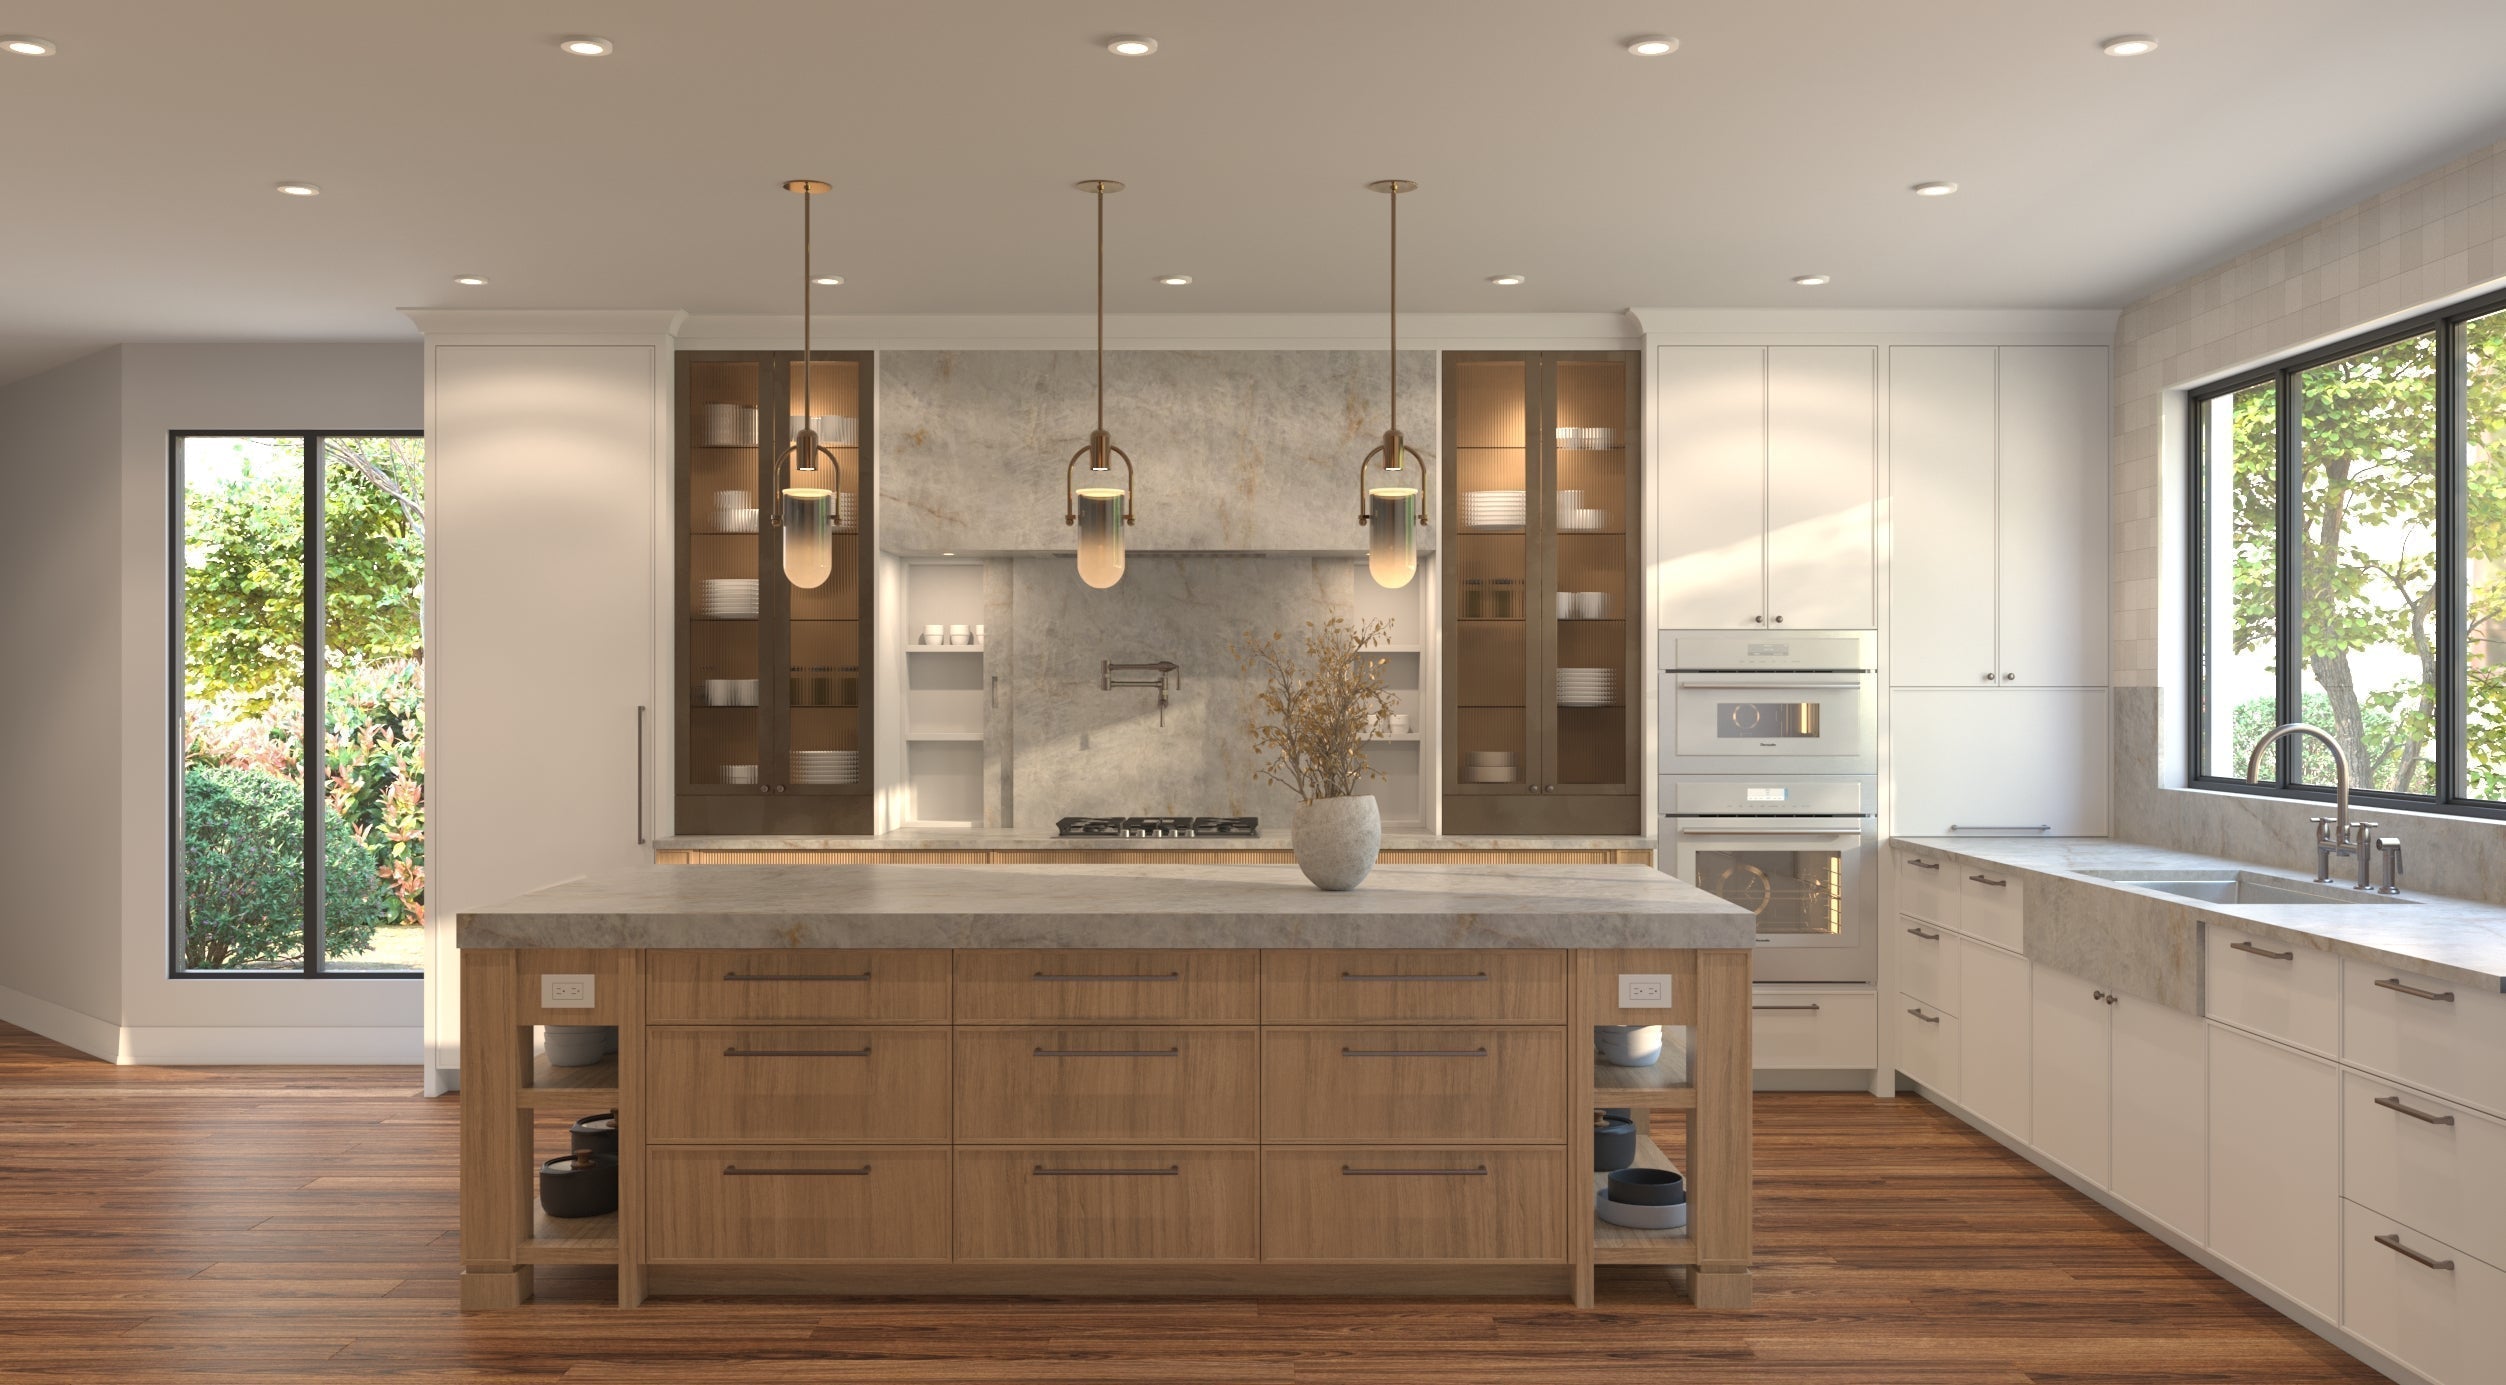
Ask a homeowner what they wish they had done differently in their kitchen renovation, and you will hear about lighting more often than almost anything else. Not because the fixtures were wrong, though that happens, but because the plan was incomplete. Because the decisions were made late, delegated to the electrician at rough-in, or reduced to "how many pot lights do we need?"
The kitchen is the hardest room in the home to light well. It requires more from its lighting than any other room: the precision of task illumination, the warmth of atmospheric light, the flexibility to transition from a 7 a.m. school routine to a dinner gathering without a single fixture change. That flexibility does not come from any single fixture. It comes from dimmers and layers.
This guide walks through the exact layered lighting approach designers use on every kitchen project. It is the same framework we apply at Astro Design Inc. when specifying a kitchen lighting plan.
Layer 1: Ambient Lighting in the Kitchen

Ambient lighting is the base layer: the general illumination that allows the room to function. In kitchens, this is almost always recessed downlighting, though it can include flush ceiling fixtures in lower-ceiling spaces.
Recessed lighting placement principles
The most important rule in recessed kitchen lighting: placement should follow the work zones, not the ceiling grid. A recessed light positioned over the countertop rather than behind the person standing at it is a functional decision.
The second principle: recessed lights should be placed to avoid shadow on work surfaces. The single most common recessed lighting error in kitchen design is installing downlights directly above the client, which places the countertop in shadow.
How many lights and where
For a standard kitchen with 9-foot ceilings, a spacing of 4 to 5 feet between recessed fixtures, measured from centre to centre, provides even ambient coverage. In larger kitchens or those with higher ceilings, this spacing may increase. The goal is coverage without redundancy: enough ambient light to illuminate the room without creating the harsh, over-lit quality of a commercial kitchen.
Common recessed lighting mistakes
- Using 6-inch cans where 4-inch would provide better light quality and a more refined visual
- Placing fixtures symmetrically on the ceiling rather than functionally over work zones
- Neglecting dimmer control, since ambient kitchen lighting should always be on a dimmer
- Mixing Kelvin temperatures between the ambient fixtures and the under-cabinet task lighting
Layer 2: Task Lighting

Task lighting in the kitchen means directed illumination over every surface where work actually happens. The ambient layer cannot achieve this. It illuminates the room, not the task. Task lighting closes that gap.
Under-cabinet lighting: LED strip vs. puck light
The under-cabinet LED strip is claiming its space in residential kitchen task lighting, and for good reason. Installed along the underside of the wall cabinets, a continuous LED strip illuminates the full length of the countertop with even, shadow-free light.
The key specifications:
- Colour temperature: match the ambient fixtures (2700K or 3000K)
- CRI (Colour Rendering Index): 90+ for accurate colour rendering of food and surfaces
- Placement: as close to the front edge of the cabinet underside as possible, to project light onto the countertop rather than the backsplash
Puck lights, individual disc fixtures mounted along the underside of the cabinet, provide focused pools of illumination and are the right choice if you want a spotlight-effect ambiance.
Island pendants: sizing, height, and spacing rules
The island pendant is among the most consequential fixture decisions in the kitchen, both for task function and for visual impact. Getting the sizing, height, and spacing right determines whether the pendant reads as considered or awkward.
Sizing: The diameter of each pendant should be approximately one-third of the island's width. For a 42-inch-wide island, a pendant in the 12- to 16-inch diameter range is appropriate. Two smaller pendants can substitute for one larger one, provided they are spaced correctly.
Height: The bottom of the pendant fixture should sit 30 to 36 inches above the island surface. This keeps the light source in the task zone while allowing unobstructed sightlines across the island.
Spacing: When using two pendants, they should be centred on the island and spaced close enough to relate to each other, far enough to illuminate the full island surface without overlap.

Over the sink lighting
The sink is a dedicated work zone that benefits from its own directed light source. A recessed downlight positioned directly over the sink, or a small pendant above it, ensures that this frequently used area is adequately illuminated without relying on ambient ceiling lights that may be several feet away.
Layer 3: Accent Lighting

Accent lighting is the layer that transforms a well-lit kitchen into an exceptional one. It is also the layer most often omitted, because it is not strictly necessary for function, and it is therefore the first category to disappear from a tight renovation budget.
This is a mistake. Accent lighting is what makes a kitchen feel considered after dark. It is the difference between a beautiful room that "turns off" when the sun goes down and one that reveals a second identity in the evening.
Inside glass cabinetry
Glass-front cabinets with interior lighting are among the most elegant details in kitchen design. A small LED strip or individual puck lights installed inside the cabinet illuminate the displayed ceramics and glassware and create a warm glow that reads across the room. Temperature should match the room's ambient fixtures.
Toe-kick lighting
LED strip lighting installed along the toe-kick, the recessed base of the cabinetry, creates a soft, floating quality that is subtle during the day and transformative in the evening. With the ambient lights dimmed, toe-kick lighting gives the kitchen a warmth and depth that no ceiling fixture can approximate.
It also serves a practical function at night: enough illumination to navigate a kitchen without switching on the full ambient layer.
Above-cabinet glow
LED strips installed on top of the upper cabinets, angled toward the ceiling, create an indirect ambient glow that warms the upper portion of the kitchen. This is particularly effective in kitchens with significant ceiling height, where the space between the top of the cabinetry and the ceiling would otherwise be a dead zone. The light bounces off the ceiling and diffuses softly into the room.
Selecting Kitchen Pendants for Your Island

Scale rules: how to size a pendant for your island
The most common pendant selection error is choosing a fixture that is beautiful in the showroom or in a catalogue image without confirming its scale relative to the actual island dimensions. A pendant that reads as perfectly proportioned in a photograph of a larger island will look undersized, and therefore tentative, over a smaller one.
Bring your island dimensions to the showroom. Know the width, know the length, and know the ceiling height. From these three numbers, a designer can identify the correct size range for your pendants before you fall in love with the wrong fixture. Or book a lighting consultation and our design team will work through the sizing with you.
Finish coordination with hardware and fixtures
Kitchen pendants are hardware. They belong in the same conversation as cabinet pulls, faucets, and appliance handles. The pendant's finish should be selected in the context of all other metal finishes in the kitchen, not independently.
This does not mean everything must match. Intentional mixing of metals, such as a matte-black pendant over an island with brushed-brass hardware, can be both sophisticated and current. The key word is intentional. The finishes should relate through proportion, undertone, or material logic, not simply coexist.
Designer picks from our showroom
The Astro Design showroom carries a curated lighting selection chosen specifically for its performance in kitchen applications: scale, light quality, finish durability, and compatibility with the materials we specify for kitchen projects. Our design team can walk you through pendant selection in the context of your specific kitchen dimensions and material palette.

Dimmer Control: The Single Upgrade That Changes Everything
If there is one piece of kitchen lighting advice that belongs above every other, it is this: put everything on dimmers.
Every circuit in a kitchen should be independently dimmable: the ambient recessed lights, the under-cabinet task lighting, the island pendants, and the accent layers. This is not a luxury specification. It is a functional requirement for a kitchen that needs to perform across the full range of daily life.
A kitchen at full illumination for food preparation and a kitchen at 20 percent for a dinner gathering are two entirely different rooms with the same fixtures, materials, and cabinetry. Dimmer control is what makes that transformation possible.
The technical consideration is that not all LED fixtures are compatible with all dimmer switches. When specifying LED under-cabinet lighting or LED strip lighting, confirm dimmer compatibility before installation. The electrician and the designer should align on this specification before rough-in.
The investment in quality dimmer switches is also worth making. Inexpensive dimmers can cause flickering, humming, or an incomplete dimming range, none of which belong in a kitchen that has been designed and built with care.
Visit our showroom to see our kitchen lighting collections with guidance from our design team, or book a consultation at astrodesigninc.com/book-a-consultation
Astro Design Inc. | 1818 A Woodward Drive, Ottawa


